

Installing Christmas lights on gutters is the single most common task in professional Christmas light installation, and it's also where most beginners make their biggest mistakes. After years of running crews and managing a community of over 43,000 professional installers, I've seen just about every gutter type, guard style, and clip combination you can imagine. This guide covers everything you need to know about hanging Christmas lights on gutters — from standard open gutters to the trickiest gutter guard setups.
| Gutter Type | Best Clip Option | Spacing |
|---|---|---|
| Standard 5" Gutter | Tuff Clips | 12" or 15" |
| Standard 6" Gutter | Tuff Clips | 12" or 15" |
| With Gutter Guard | Tuff Mag or Specialty | 12" or 15" |
- Measure gutter dimensions (standard 5" or 6")
- Select appropriate clips (Tuff Clips for standard, Tuff Mag for gutter guards)
- Pre-clip light strands at shop with 12" or 15" spacing
- Transport pre-clipped strands to installation site
- Snap clips onto gutter lip during installation
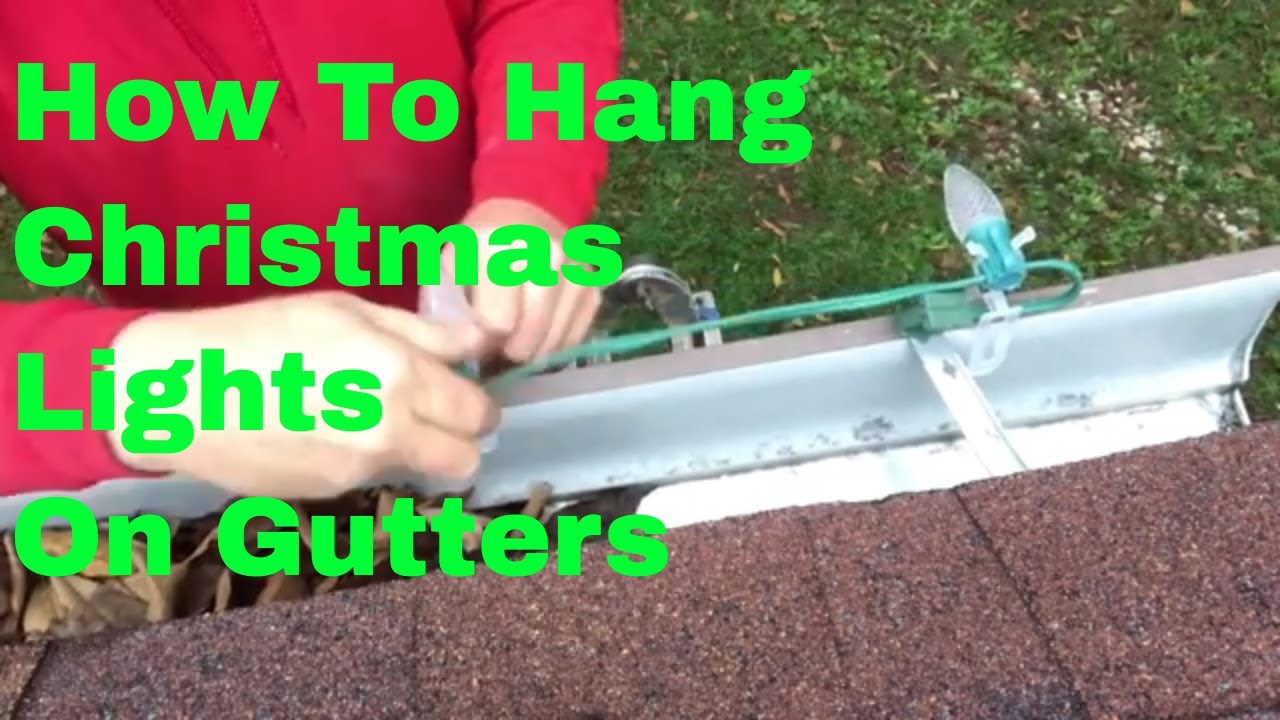
Why Gutters Are the Foundation of Every Christmas Light Install
Roughly 80% of the Christmas lights you'll install on any residential job go directly onto the gutter line. The roofline is what defines the outline of a home, and gutters give you a consistent, sturdy mounting point that runs the full length of the eaves. When you get gutter installations dialed in, the rest of the job — windows and doors, bushes, and tree wraps — becomes a lot faster because your main power runs are already in place along the roofline.
The key advantage of gutter-mounted lights is that you're not putting holes in the roof, not using adhesive that can fail in cold weather, and not relying on friction-based clips that slide off in wind. A proper gutter clip grabs the lip of the gutter and holds the bulb securely through rain, snow, ice, and 40 mph gusts. That's why every professional installer I know starts their training with gutter technique before anything else.
Types of Gutters You'll Encounter on the Job
Not all gutters are created equal, and the clip you use on one type may not work at all on another. Here's what you'll see in the field:
K-Style (Ogee) Gutters are by far the most common in residential construction, probably 70-75% of the homes you'll work on. They have a flat back, a curved front lip, and a distinctive profile that looks like the letter K from the side. Standard gutter clips work perfectly on these because the front lip gives you a solid grab point. The lip is typically thick enough to hold any commercial clip without bending.
Half-Round Gutters are exactly what they sound like — a half-circle shape. You'll find these on older homes, historic districts, and higher-end custom builds. Standard clips don't grip these well because there's no flat lip. You need either a specialized half-round clip or an adhesive clip solution. Some installers use a wrap-around clip that hooks under the rounded edge.
Box Gutters (Built-In Gutters) are integrated into the roof structure itself — there's no exposed lip to clip onto. These are common on commercial buildings and some mid-century residential. For these, you'll often need to clip to the fascia board or the drip edge instead, using shingle tabs or tough clips mounted to the fascia.
Fascia Gutters mount flush against the fascia board with hidden hangers. The front profile can be very slim, which means standard clips may not grip securely. Test your clip fit before committing to a full run — you may need a clip with a longer hook or a different approach entirely.
Choosing the Right Clips for Gutter Installations
Clip selection is where experienced installers separate themselves from amateurs. The wrong clip means callbacks, fallen lights, and unhappy customers. Here's how to match clips to the job:
Tough Clips (Enclosed Clips) are the only clips we use and recommend. These are the best gutter clips on the market — they have an enclosed design that fully wraps around the C9 bulb base and locks it in place. Unlike open-channel clips where bulbs can pop out in wind or during install, the enclosed design of tough clips means once that bulb is seated, it's not going anywhere. They hook securely onto the front lip of K-style gutters and hold through rain, ice, and serious wind. You can find these in our Christmas light clips collection.
The reason we go exclusively with tough clips is simple: fewer callbacks, faster installs, and a cleaner finished look. We've tried every clip on the market over the years, and nothing else comes close in terms of reliability. They grip the gutter lip firmly without bending it, they release cleanly during takedown, and they last multiple seasons. Stop buying five different clip types — just stock tough clips and you're covered for the vast majority of gutter jobs.
Installing Christmas Lights on Gutters With Gutter Guards
Gutter guards are the number one challenge that new installers email me about. The homeowner spent $3,000-$10,000 on gutter protection, and they absolutely do not want you damaging it. At the same time, many gutter guard styles cover the lip that your clips need to grab. Here's how to handle the most common types:
Mesh/Screen Guards sit on top of the gutter and are usually held in place by sliding under the first row of shingles. In many cases, you can gently lift the front edge of the mesh and slide your clip underneath so it grabs the actual gutter lip beneath the guard. The mesh flexes back into place and the clip holds just fine. Don't force it — if the mesh is riveted or screwed down, you need a different approach.
Solid Cover Guards (LeafGuard, Gutter Helmet, etc.) are the trickiest. These have a curved solid cover with a narrow slot for water to flow through. There's no lip to access. For these, your best options are: (1) clip to the front edge of the guard itself if it's rigid enough, (2) use adhesive-backed clips on the guard surface, or (3) clip to the shingle or drip edge above the gutter instead.
Foam Insert Guards are the easiest gutter guards to work with. The foam sits inside the gutter but doesn't cover the lip. Standard gutter clips work perfectly — just clip right to the lip as if the guard wasn't there.
Reverse Curve Guards have a curved surface that directs water around and into the gutter via surface tension. You can usually clip to the outer edge of the curve, but test it first. Some reverse curve systems have a very thin outer edge that won't hold a clip. In those cases, I recommend the shingle-line approach.
One critical rule: never remove a customer's gutter guards to install lights. If you take them off, you own any problems that happen afterward — leaks, improper reinstallation, warranty void. Find a way to work with what's there, or be upfront with the customer that their particular guard type adds complexity and may require an adjusted approach.
Step-by-Step Gutter Installation Process
Here's the process I train every new crew member on. This works for standard K-style gutters with C9 bulbs — adjust as needed for other setups.
Step 1: Pre-roll and clip on the ground before you ever get to the job. This is non-negotiable in our operation. Before your crew ever shows up at the customer's house, your stringer wire should already be pre-rolled with tough clips attached at the correct spacing. For C9 bulbs, that's 12-inch spacing. We do all of our pre-rolling at the shop — lay out the stringer wire, snap the enclosed clips onto every socket, roll it back up, and it's ready to go. When you get to the job site, your crew just unrolls, clips to the gutter, and moves on. This alone will cut your install time in half compared to crews that are fumbling with loose clips on a ladder.
Step 2: Start at the power source. Identify where your extension cord or power run connects and begin your installation there. This ensures your male plug end is where you need it. Work away from the power source, clipping as you go.
Step 3: Clip every socket. Every single socket on the stringer wire should have a clip, and every clip should be firmly attached to the gutter. Skipping clips is how you get sagging lines that look unprofessional and are more likely to blow off in wind. If your spacing doesn't perfectly match the gutter length, it's better to slightly bunch clips at the end than to leave gaps.
Step 4: Install bulbs after clipping. Since your stringer is already pre-rolled with clips from the shop, once it's hung on the gutter you just walk back and screw in bulbs. This lets you spot any clip that didn't seat properly before the bulbs are in the way, and keeps bulbs from getting knocked loose during the clipping process.
Step 5: Tuck your wire. The stringer wire between clips should be tucked up against the gutter, not dangling in a visible loop. This is a detail that separates a $50,000/season operation from a $200,000/season operation. Clean lines look professional and justify premium pricing.
Need a visual walkthrough? Check our Christmas light calculator to estimate materials before your next job, then watch the videos below for technique.
Common Gutter Installation Mistakes (And How to Avoid Them)
Using cheap or generic clips. I see this constantly with new installers trying to save a few bucks on clips. The cheap clips from the big box store aren't built for commercial use — they crack in cold weather, they don't grip the gutter lip firmly, and they let bulbs fall out in wind. Invest in quality tough clips (enclosed clips) and you'll eliminate most of your callback issues. They cost a bit more per unit but they last multiple seasons and hold bulbs securely. Check out our complete clip guide for more details.
Not pre-rolling at the shop. If your crew is still attaching individual clips on the ladder, you're burning time and money. Pre-roll everything at the shop with your tough clips already snapped onto the stringer wire. Your crew should never be handling loose clips on a roofline — that's how clips get dropped, time gets wasted, and installs look sloppy.
Not planning your power runs. Your gutter runs are usually the longest continuous runs on a house, so plan where your power connections are before you start hanging. Most residential circuits are 15 or 20 amps, and you're sharing that with whatever else is on the circuit. With LED C9s you can run significantly more footage per circuit than the old days, but you still need to map out which outlets feed which runs. Check your voltage drop calculations on any run over 150 feet.
Ignoring wind exposure. The gutter line on a two-story home facing the prevailing wind takes a beating. Double-check your clips on wind-exposed faces, and consider using clips with a more aggressive hook profile. Some installers add a small zip tie as a safety backup on the windward side of the house.
Forgetting about takedown. Every clip you install has to come off in January. Choose clips that release cleanly without tools. Clips that require pliers to remove will slow your takedown crew dramatically and cut into your profit margin.
Watch Our Video Guides
These videos from our YouTube channel walk you through gutter installations step by step, including how to handle gutter guards:
Related Guides
If you're working on gutter installations, these related guides will help you handle the rest of the roofline and choose the right products:
- How to Hang Christmas Lights on a Roof Like a Pro — covers ridge lines, hips, and valleys beyond the gutter
- Best Christmas Light Clips: Complete Guide for Contractors — deep dive into every clip type available
- C9 vs C7 Christmas Lights: Which Should You Use? — choosing the right bulb for gutter runs
- Ridge Clips for Christmas Lights: Complete Installation Guide — for when you need to clip above the gutter line
- Christmas Light Installation Equipment List — make sure your truck is stocked for gutter work
- Adhesive Christmas Light Clips: When and How to Use Them — your backup plan for tricky gutter types
Frequently Asked Questions
What clips work best for installing Christmas lights on gutters?
Tough clips (enclosed clips) are what we use on every job. They hook onto the front lip of K-style gutters and the enclosed design locks the C9 bulb base securely in place. For gutters with guards, you may need to clip to the guard edge or use the shingle line above the gutter. For half-round gutters, you'll need a specialized half-round clip. But for the 75% of homes with standard K-style gutters, tough clips are all you need — stock those and you're set.
How do you install Christmas lights on gutters with gutter guards?
It depends on the guard type. For mesh or screen guards, you can usually lift the front edge and slide your clip underneath to grab the gutter lip. For solid cover guards like LeafGuard or Gutter Helmet, clip to the guard edge itself, use adhesive clips, or mount to the shingle line above the gutter. For foam inserts, just clip normally since the lip is still exposed. The most important rule is to never remove a customer's gutter guards — find a way to work with them or adjust your approach.
How far apart should Christmas light clips be on gutters?
Every socket on your stringer wire should have a clip — so your clip spacing matches your bulb spacing. For C9 lights, that's typically every 12 inches. For C7 lights, it's typically every 12 inches as well though some stringers use 6-inch or 15-inch spacing. Skipping clips leads to sagging wire and a sloppy appearance. Check our lights per foot spacing guide for detailed calculations.
Can Christmas light clips damage gutters?
Quality commercial clips designed for gutters will not damage them when installed and removed properly. The clips hook over the lip without penetrating the gutter material. Problems only arise when installers use oversized clips that bend the lip, force clips onto gutters they weren't designed for, or leave clips on year-round where they can corrode. Always remove clips during takedown and inspect them for damage before reusing next season.
Should I use C9 or C7 lights on gutter lines?
Most professional installers use C9 LED bulbs for gutter lines because they're visible from the street, energy efficient, and create a bold roofline outline. C7 bulbs are smaller and work well for detail areas like windows and doors, but on a roofline they can look undersized — especially on two-story homes. If budget is a concern for the customer, LED C9s are what every pro should be running — the energy savings, the consistency, and the brightness make them the clear choice for gutter lines. Read our full C9 vs C7 comparison for more detail.