

Installing Christmas lights on a two story house is the single biggest skill that separates pro contractors from weekend warriors — it's where the money is, where the safety risks live, and where most installers either build their reputation or quit the trade. I've personally hung lights on more two story homes than I can count, and the difference between a fast, clean two story install and a six-hour disaster comes down to a few specific decisions you make before you ever set foot on the ladder.
Why Two Story Homes Are Your Highest-Margin Job
A two story house is the sweet spot for a professional Christmas light installer. The homeowner has the budget, the lot usually has the curb appeal that justifies a $1,500–$3,000 ticket, and the install is technically demanding enough that the customer isn't going to try it themselves next year. Single story ranches are easy money but small tickets. Three story estates are big tickets but slow, equipment-heavy installs that eat your day. The two story house is where you can run a focused crew, knock out the install in half a day, and walk away with a check that funds the next week of operations.
Here's the part that surprises new installers: you do not charge more for the second story. Your installed price is $8–$12 per linear foot whether the gutter is 9 feet off the ground or 22 feet off the ground. The price is set by the linear footage you're lighting, not by the height. Why? Because your customers will compare quotes side by side, and a competitor charging a flat per-foot rate will look cleaner on paper than your tiered "second story upcharge." Bake the additional time and ladder work into your per-foot number and quote it consistently.
A typical two story home has 120–180 linear feet of lit roofline once you count the front face, the gables, and the dormers. At $10/ft installed (including takedown), that's a $1,200–$1,800 ticket. Add tree wrapping for a couple of large evergreens at $600+ each, and you've turned a single stop into a $2,500–$3,500 day for a two-person crew. This is how my crews put together $10,000 days — five jobs at an average ticket of $2,000, knocking out each install in roughly two hours. That's why the two story house is the job to chase.
The Equipment You Actually Need for a Two Story Install
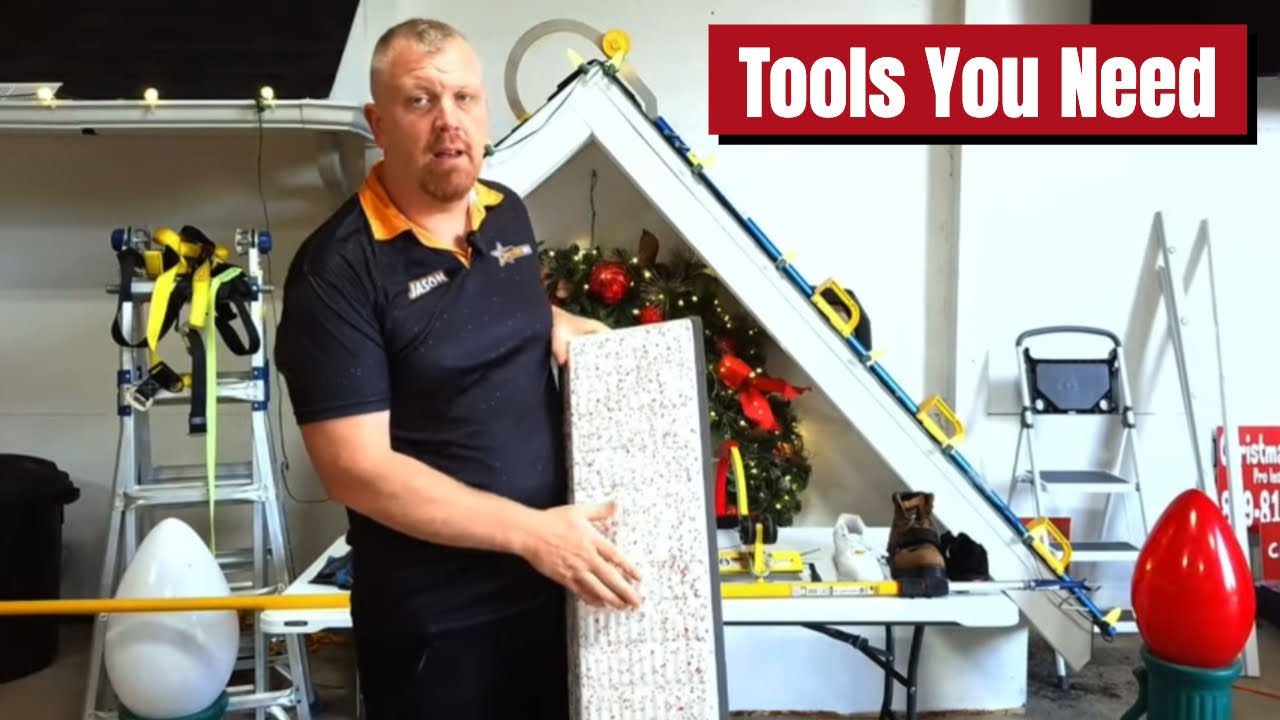
Here's the truth about second story Christmas light installation gear: you don't need a roof tile cutter, you don't need a circuit tracer, and you don't need an electrical tape arsenal. You need a few specific tools, dialed in. My full equipment list is here, but the short version for two story work is below.
| Tool | Why You Need It on Two Story | Pro Tier vs. Budget |
|---|---|---|
| 28-ft or 32-ft extension ladder | Reaches second story gutter with a safe overlap | Aluminum — lighter, faster to reposition than fiberglass |
| Ladder standoff / stabilizer | Mandatory — keeps the ladder off the gutter and off windows | Quick-release standoff is worth every penny |
| Mr. Reach pole ($40–$50) | Hook strands up to a high gutter without climbing | Water-fed pole ($500–$1,000) for premium speed |
| Fisherman's vest | Holds clips, bulbs, and cutters while you climb — both hands free | Skip the tool belt — too heavy for ladder work |
| Precision cutters + side cutters | The only cutting tools you need for the entire job | Don't buy wire strippers — you won't use them |
| Tuff Clips (enclosed) | The 99%-of-jobs clip — gutter, shingle, fascia | Skip all-in-one clips — at takedown they fly everywhere and stick on the roof |
One myth I want to kill: you don't need a fiberglass ladder for Christmas light work. I broke this down in detail in my ladder comparison guide, but aluminum ladders are lighter, faster to maneuver, and perfectly safe for a residential Christmas light job. You're not working on live overhead service drops. The fiberglass requirement is an electrician's rule, not yours.
Pre-Bulb and Pre-Clip at the Shop — Every Strand, Every Time
The single biggest speed multiplier for two story installs is doing every bit of bulb-loading and clip-loading before you leave the shop. This is non-negotiable. My full pre-bulb shop workflow is here — read it if you haven't. The version that matters for a two story install:
- Don't measure the house ahead of time. Cut on the roof, not at the shop. You don't need a tape measure or a calculator beforehand — the strand itself is your measuring tool.
- Pre-bulb and pre-clip at the same time. Push each C9 LED bulb into the socket and snap a Tuff Clip onto the same socket in one motion. Bulb and clip happen together. This is the move that separates a pro shop workflow from amateurs who do them in two passes.
- Build one long continuous run — 1,000 ft or more. Don't pre-cut into strand-size pieces. Run the entire spool, bulbed and clipped, end to end as one continuous line.
- Drop it into a big trash can. No coiling, no labeling, no zip-tie tags. The pre-bulbed, pre-clipped line pays itself right out of a 32-gallon trash can on the truck and at the house. It pulls clean every time.
- Cut on the roof as you go. Run the line down the gutter, drop the last bulb where the section ends, cut, and move to the next section. The house is your cut list — not a tape measure the night before.
The reason this matters so much on a two story house: every minute spent fiddling with bulbs and clips at the top of a 28-foot ladder is a minute of unnecessary risk and a minute the customer is watching you instead of admiring your work. Pre-loaded strands feeding out of the trash can let you go up, clip, cut, come down. That's the entire job at height.
The Two Story Ladder Method — Set It Up Right or Get Hurt
I'm a firefighter and an EMT in addition to running a Christmas light installation business and a 43,000+ member installer community. I've responded to ladder falls. They don't end well. Most of the falls I've seen happened on the second story — not because the height is dangerous on its own, but because installers cut corners on ladder setup when they're tired and the day is running long.
The non-negotiables for second story ladder work:
- 4:1 angle. For every 4 feet of ladder height, the base sits 1 foot out from the wall. A 28-foot ladder set to a 24-foot gutter has its base 6 feet from the wall. Memorize this.
- Three feet of ladder above the gutter. The top of the ladder should extend 3 feet above the gutter line so you have a handhold when stepping on or off the roof.
- Standoff/stabilizer is mandatory. Never lean the ladder directly on the gutter — you'll dent it or pull it off the fascia. A standoff also pushes the ladder away from the wall so you can work the gutter directly in front of you, and it spreads the contact points wide enough that the ladder is far less likely to tip sideways. Fewer falls, period.
- Both feet on solid, level ground. Use ladder levelers on sloped lots. Driveways and sidewalks lull people into thinking they're flat — they aren't.
- Three points of contact, every step. Two hands and a foot, or two feet and a hand. Always.
- Don't lean — climb down and move. Reaching sideways from a 24-foot height is how installers fall. Climb down, reset the ladder, climb up. It feels slow. It is faster than the ambulance ride.
If you have a fear of heights, that's not a disqualification — it's an asset. Healthy fear keeps you alive. The installers I worry about are the ones who stopped feeling fear at 24 feet five years ago.
The Install Workflow on a Two Story House
Once the ladder is set and the trash can of pre-bulbed line is on the ground next to it, the work goes fast. Here's the order I run:
- Start at one side of the house with the female end of the line. Power on most homes lives in the middle (the outlet by the front door), so you'll start on one corner with a female end, work across the front, and tie power in mid-run when you get to it.
- Feed the line straight out of the trash can on the ground. The pre-bulbed, pre-clipped line pulls itself out — no coiling, no untangling. The ground crew tends the can while the climber moves down the gutter.
- Clip every socket onto the gutter lip. Tuff Clips snap onto the front edge of an aluminum or steel gutter and stay there. Maintain 12" or 15" spacing — never 8" or 9". The wider spacing gives the bulbs visual rhythm at the curb.
- Run the valleys when they're the cleanest path. Valleys are actually the safest spot on the roof to walk and route a strand — flat, supported, and out of the wind. The old rule about avoiding valleys assumes ice or snow on the roof; if there's ice up there, you shouldn't be on the roof at all. On a dry winter install, the valley is your friend. My roofline guide covers the rest of the path-planning.
- Tie power in when you reach the middle of the house. When the line crosses the front-door outlet location, tie in your power tap there — an all-in-one plug works for this connection — and continue the run to the far end.
- Transition between sections with a visible jumper. If the gables aren't continuous with the main gutter, accept a short stretch of visible wire between them. Visible wire is normal on a clean install.
- Cut on the roof at the last bulb in each section. When the section ends, set the last bulb, cut the line, and move to the next section. Don't pre-cut at the shop — the house tells you where to cut.
The pre-clip and pre-bulb workflow turns this into a clip-and-go operation. You're not measuring, you're not coiling, you're not labeling — you're pulling line out of a can and cutting it where the house ends. A trained two-person crew runs a typical two story house in about 2 hours start to finish.
Running Power: The Part Most Installers Get Wrong
Power routing on a two story house is mostly a single story problem — the outlets and the GFCI live near the ground. My full power-routing guide is here, but the two-story-specific rules:
- Plug in by the front door. 9 times out of 10, that's where you'll find the exterior GFCI outlet on a two story home. Start the front face with a female end at one corner, work across, and tie your power tap in when the line passes the front-door outlet.
- Run the cord down behind the gutter downspout. Use a clip to secure the cord behind the downspout so it stays tucked and looks clean from the curb. Do not use zip ties — they look unprofessional, they're hard to take down, and they cut into the wire.
- Make your own extension cords from SPT-1 zip wire and zip plugs. Cut to length. No coiled-up store cord lying on the lawn.
- Never test the homeowner's GFCI. If it fails on your test, you own the repair. Just plug in, verify the strand lights, and move on.
- LEDs draw less than 1 amp per 100 bulbs. A 100-bulb C9 LED strand pulls roughly 90 watts. You can chain hundreds of feet on a single SPT-1 run before you approach the 10-amp limit. Voltage drop is the real long-run concern, not amperage.
- No power injection. No taped connections. No sealed joints. Power injection is a permanent lighting concept. For seasonal C9 LED runs, just split into two runs at the male/female junction if you have to. Tape traps water and trips GFCIs. Read my GFCI guide for the full breakdown.
Vampire plug definition: A vampire plug (or zip plug) is a snap-on male or female plug that pierces SPT-1 or SPT-2 zip wire to make a custom-length extension cord on the spot, with no stripping or soldering required. They're the foundation of pro-grade cord management. Full vampire plug tutorial here.
Common Two Story Mistakes That Cost You Money
I see the same mistakes from new installers every season. Avoid these and you'll be ahead of 80% of competitors in your market:
- Using mini lights on SPT wire for the roofline. Mini lights are for bushes and trees. Roof and gable runs are C9 LED only — they're brighter, they look like a pro install from the curb, and they hold up.
- Using all-in-one clips instead of Tuff Clips. The real headache shows up at takedown — all-in-one clips pop off the strand and go flying everywhere. Half of them land back on the roof and you'll have to climb up just to knock them off. Tuff Clips (enclosed) stay assembled with the bulb through takedown, coiling, and storage. That's why every pro uses them.
- Tight 8" or 9" bulb spacing. Looks busy and uneven from the curb. Stick to 12" or 15".
- Removing bulbs at takedown. Don't. Bulbs stay clipped to the strand. Coil the whole assembly with the bulbs and clips in place using the circle wrap method.
- Quoting a second-story upcharge. Customers will get a competing quote with a flat rate and you'll lose the job. Roll the height into your per-foot number.
- Sending one person to a two story job. Two-person crew minimum on any roof over 12 feet. Ground spotter for the ladder, climber on the roof.
- Skipping the takedown discussion at sale. Takedown is included in the $8–$12/ft installed price. Selling it as a separate add-on confuses customers and shrinks the ticket.
Two Story Pricing and Sales Math
Here's how I actually quote a two story house. Walk the property with a tape, count the linear feet, multiply by your rate. For most contractors I coach, the math looks like this:
| Home Size | Lit Linear Feet | Ticket at $10/ft | Crew Time (2 people) |
|---|---|---|---|
| Modest 2-story (front face only) | 100 ft | $1,000 | 1–1.5 hours |
| Standard 2-story (front + gables) | 150 ft | $1,500 | 2 hours |
| Large 2-story (front + gables + dormers) | 200 ft | $2,000 | 2–3 hours |
| 2-story with wraparound + 2 trees | 220 ft + 2 trees | $3,400+ | 3–4 hours |
Your standard package is 100 feet at $8–$12 per linear foot. Average ticket should be $1,000 minimum — target $1,500–$2,000. A two story house with even modest tree wrapping should beat your average ticket every time. My bidding guide and pricing guide walk through the full numbers.
One sales rule I drilled into every crew member: sell the job, take the 50% deposit, then buy the lights. Don't carry $20,000 in C9 inventory hoping to sell it later. Our pro kits ship fast — order after the deposit lands.
Two Story Takedown — Same Crew, Different Approach
Takedown on a two story house follows the same rules as installation: pre-pack, ladder discipline, no shortcuts. The job-specific notes:
- Take it down with bulbs and clips assembled. Use the circle wrap method as you pull the strand off the gutter — never figure-eight, never strip the bulbs.
- One tote per house. Every strand for that customer goes back in the same tote it came out of, labeled with the address.
- Number system labeling. County-based numbers on each tote so you can find any customer's box in 30 seconds next October.
- Plan for 10–20 takedowns per day. Two story takedowns are about the same speed as install once the strands are off the gutter — coiling is the slow part, climbing is the fast part.
- Takedown is included in the $8–$12/ft installed price. Standalone takedown ($75–$200) is only for jobs you didn't install. Red carpet service means the customer never thinks about it.
Related Guides
- How to Hang Christmas Lights on a Roof Like a Pro
- Christmas Lights and Gutters: The Complete Installation Guide
- How to Install Christmas Lights Around Windows and Doors Like a Pro
- Ridge Clips for Christmas Lights: Complete Installation Guide
- Christmas Light Installation Safety: A Pro Contractor's Complete Guide
- Aluminum vs. Fiberglass Ladders for Christmas Light Installation
- C9 LED Christmas Lights: The Complete Contractor's Guide
- How Many Christmas Lights Per Foot: Spacing Guide
Shop the gear that goes on every two story job we run: C9 LED bulbs, Tuff Clips, and our professional installer kits.
Frequently Asked Questions
How long does it take to install Christmas lights on a two story house?
A trained two-person crew with a pre-bulbed, pre-clipped line in a trash can does a standard 150-foot two story home in about 2 hours from arrival to drive-away. Newer installers run 2 to 4 hours on the same house, and someone who loads bulbs and clips on the ladder routinely takes 6+ hours. Two hours per job is how a crew gets to a $10,000 day — five jobs at a $2,000 average ticket.
Do you charge more for second story Christmas light installation?
No. Professional contractors use a flat $8–$12 per linear foot installed rate regardless of story height. Tiered upcharges for second story work make your quote look more expensive than a competitor's flat rate, even when the totals are identical. Bake the additional ladder time and risk into your per-foot number and quote consistently.
What size ladder do I need for a two story house?
A 28-foot or 32-foot extension ladder covers the gutter line on almost every residential two story home. The ladder should extend at least 3 feet above the gutter, set at a 4:1 angle with a stabilizer/standoff attached. Aluminum ladders are lighter and faster to reposition than fiberglass — fiberglass is not required for Christmas light work.
Can I install Christmas lights on a two story house by myself?
You can, but you shouldn't. Any roof over 12 feet calls for a two-person crew with one climber and one ground spotter holding the ladder. Solo two story work is how installers end up in the emergency room. A second crew member also cuts install time in half because they can feed pre-loaded strands up from the ground while the climber clips.
What's the best clip for second story Christmas light installation?
Tuff Clips (the enclosed-style clip) are the right choice for 99% of two story roofline jobs. They snap onto aluminum or steel gutters at 12" or 15" spacing and stay attached through wind, ice, and a full takedown cycle without needing removal. For specialty surfaces, the Tuff Mag (metal roofs), Tuff Tile (Spanish tile), Tuff Shingle (shingle direct), and Wedge Clip (under-shingle) handle the edge cases.